






Quick Answer:
To begin programming a new PXI or PXI Express real-time controller, install a compatible LabVIEW development environment, Real-Time Module, and hardware drivers on the host computer. Next, configure the real-time target in NI MAX, create the host and real-time VIs, and then build and deploy the application to the controller.
Getting Started with PXI(e) Real-Time Target Programming
A new PXI or PXI Express real-time system must be prepared before it can run a deterministic measurement, control, or test application. The development computer provides the programming environment, while the real-time controller executes the deployed application independently inside the PXI system.
This guide introduces the basic workflow for programming a new PXI or PXI Express real-time controller, from software installation and target configuration to application deployment.
Real-Time Development Workflow
- Install the required software and hardware drivers.
- Configure the PXI(e) real-time target.
- Create and test the real-time application.
- Build and deploy the application to the target.
Before You Begin
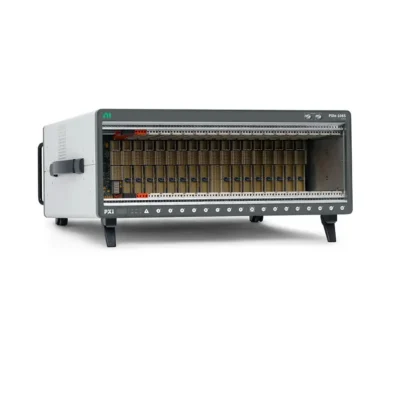
Confirm that the Шасси PXI или PXI Express, controller, installed PXI модули, operating system, LabVIEW version, Real-Time Module, and device drivers are mutually compatible. The host computer and real-time target should also be connected to the same network subnet during the initial configuration.
Compatibility Note:
Older NI documentation may refer to LabVIEW 8.0, the LabVIEW Real-Time Module 8.0, or the LabWindows/CVI Real-Time Module 8.0 as minimum versions. For an actual installation, use software versions supported by the exact controller model and target operating system rather than relying only on the historical minimum version.
Step 1: Install the Required Software and Drivers
The first step is to install the appropriate NI development software and device drivers on the Windows host or development computer. The exact components depend on whether the application will be developed in LabVIEW or LabWindows/CVI and which PXI modules are installed in the system.
Typical Software Requirements
- NI LabVIEW Development System for Windows.
- NI LabVIEW Real-Time Module, or the applicable LabWindows/CVI Real-Time software.
- Hardware drivers required by the installed PXI or PXI Express modules.
- NI Measurement & Automation Explorer (NI MAX), normally installed with supported NI drivers.
Verify Software Compatibility
Check compatibility among the PXI(e) controller, LabVIEW, the Real-Time Module, the controller operating system, and all required hardware drivers. A driver that supports the host operating system may not necessarily support the selected LabVIEW version or the real-time operating system on the target.
Install Support for the Correct Development Environment
When installing a device driver, select support for the LabVIEW or LabWindows/CVI version used by the project. If the development environment was installed after the driver, modify or repair the driver installation so that the required application development support is added.
Activate Licensed Software
Activate LabVIEW, the Real-Time Module, and any other licensed NI software after installation. Restart the host computer if requested before proceeding with target configuration.
Step 2: Configure the PXI(e) Real-Time Target in NI MAX
After installing the required software on the host computer, use NI MAX to discover and configure the real-time controller. During the first setup, connect the PXI(e) target and host computer to the same subnet so that NI MAX can locate the controller.
Discover the Real-Time Controller
- Power on the PXI or PXI Express chassis and real-time controller.
- Connect the controller and host computer to the same Ethernet network.
- Open NI MAX on the host computer.
- Expand Remote Systems.
- Select the detected PXI(e) real-time target.
If the target does not appear, refresh NI MAX and verify the Ethernet cable, controller IP settings, host firewall, subnet configuration, and chassis power. Directly connecting the host computer to the controller can also help during initial troubleshooting.
Configure General Target Settings
Assign or confirm the controller name, IP address, subnet mask, gateway, time settings, and other system options. Apply the configuration and restart the controller if NI MAX requests it.
Install Software on the Real-Time Target
In NI MAX, select the software section under the remote target and install a compatible software set. This normally includes the real-time runtime engine and the hardware drivers required by the modules installed in the chassis.
Keep the target software versions aligned with the development computer. Version mismatches can prevent deployment or cause a module to be unavailable to the real-time application.
Step 3: Create a Real-Time Application
A typical PXI(e) real-time application contains code that runs on the real-time target and, when required, a host application that displays data, sends commands, records results, or provides an operator interface.
Open the Real-Time Application Tutorial
- Start LabVIEW.
- Select Help > LabVIEW Help.
- Navigate to the Real-Time Module documentation.
- Open the tutorial for creating a real-time application.
- Follow the tutorial to create the host and real-time portions of the application.
Create the LabVIEW Project
Create a LabVIEW project and add the PXI(e) real-time controller as a target. Add the required chassis and modules beneath the target, then create the VIs that will execute on the controller.
Place time-critical acquisition, control, and processing code on the real-time target. Use a host VI for visualization, configuration, file management, or user interaction when those functions do not need deterministic execution.
Establish Communication Between the Host and Target
Depending on the application, the host and real-time target can exchange data through network streams, network-published shared variables, TCP/IP, UDP, or another supported communication method. Select the method according to the required data rate, latency, reliability, and system architecture.
Test the Application Interactively
Run the real-time VI from the LabVIEW project before creating a startup application. Verify module access, loop timing, error handling, host communication, and safe shutdown behavior while the development computer is connected.
Step 4: Build and Deploy the Real-Time Application
After the application runs correctly in the development environment, build it as a stand-alone real-time application and deploy it to the PXI(e) controller. A deployed startup application can run automatically when the controller boots, without requiring LabVIEW to remain open on the host computer.
Open the Real-Time Getting Started Example
- Start LabVIEW.
- Select Help > Find Examples to open NI Example Finder.
- Browse to Toolkits and Modules > Real-Time > Tutorials.
- Open Getting Started.lvproj in the Project Explorer window.
Menu names and example locations can vary by LabVIEW version. If the example is not available at the stated location, search NI Example Finder for “Real-Time Getting Started” or a similar real-time deployment example.
Create a Real-Time Application Build Specification
- In the LabVIEW project, locate the PXI(e) real-time target.
- Right-click Build Specifications.
- Select New > Real-Time Application.
- Select the top-level real-time VI as the startup VI.
- Configure source files, destinations, and additional build settings.
- Build the application and resolve any reported errors.
Deploy and Run the Application
Deploy the completed build to the real-time controller and run it from the project to confirm correct operation. Monitor errors, CPU load, memory use, timing behavior, network communication, and data acquisition before setting the application to launch automatically.
Configure the Application to Run at Startup
After deployment testing is complete, set the real-time application as the startup application and restart the controller. Confirm that it launches correctly without manual interaction and that the system enters a safe state if a module, network connection, or host application is unavailable.
Common Setup Problems
The Real-Time Target Does Not Appear in NI MAX
Confirm that the host and target are on the same subnet, refresh the Remote Systems list, check the Ethernet connection and firewall, and verify that the controller is powered and has completed its boot sequence.
LabVIEW Cannot Connect to the Target
Verify the controller IP address, network reachability, LabVIEW Real-Time installation, target software set, and compatibility between the host software and the real-time operating system.
A PXI Module Is Missing or Unavailable
Confirm that the module is installed correctly, supported by the chassis and controller, and recognized in NI MAX. Install the correct hardware driver on both the host and real-time target when target-side driver support is required.
The Application Runs Interactively but Fails at Startup
Check that all required VIs and support files are included in the build, that file paths are valid on the real-time target, and that the application does not depend on a host resource that is unavailable during boot.
Frequently Asked Questions
Can I program a PXI(e) real-time controller directly from LabVIEW?
Yes. Add the real-time controller to a LabVIEW project, create VIs beneath the target, and deploy them through the LabVIEW Real-Time Module. The exact supported software depends on the controller model and operating system.
Do the host computer and PXI(e) controller need to be on the same subnet?
They should normally be on the same subnet for initial discovery and configuration in NI MAX. More advanced network arrangements may be possible after the target has been configured correctly.
Does a deployed real-time application require the host computer?
Not necessarily. A stand-alone startup application can execute directly on the real-time controller. A host computer is only required if the system design depends on a host interface, remote commands, visualization, data transfer, or another host-side function.
Why must drivers be installed on both the host and real-time target?
The host needs development support so LabVIEW can configure and program the hardware, while the real-time target needs compatible runtime components to communicate with supported modules during application execution.
How can I confirm that the system is ready for deployment?
Verify that the target appears in NI MAX, the required modules are detected, all software versions are compatible, the real-time VI runs without errors, host communication is stable, and the built application operates correctly after restarting the controller.
Заключение
Programming a PXI(e) real-time system follows four main stages: install compatible NI software and drivers, configure the controller in NI MAX, create and test the real-time application, and then build and deploy it to the target.
Careful compatibility checks are essential because the controller model, real-time operating system, LabVIEW version, Real-Time Module, and hardware drivers must work together. Once the system is configured correctly, the PXI(e) controller can execute reliable stand-alone test, measurement, monitoring, and control applications.
Categories
Latest Articles
Products on Sale


Need Help Choosing a Product?
Contact our sales team for product selection, pricing, availability and lead-time information.
sales@pxisource.com